

2018 School Spending Survey Report
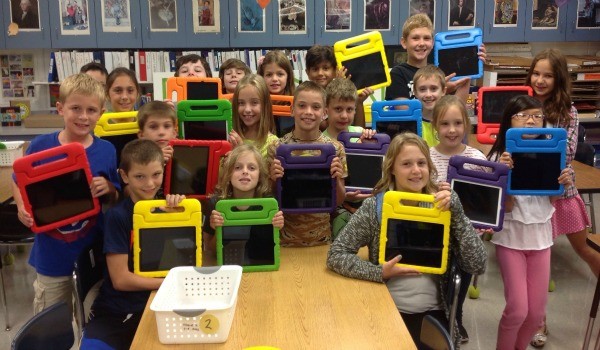
iPads Reimagine Art Class
Here’s how one elementary-school art teacher used iPads and a Do lnk app to extend learning digitally and expand the curriculum.
 For nearly 17 years, I’ve been trying to find ways to integrate technology into my K–5 art room. It proved to be cumbersome, as my students lugged out laptops to navigate complicated software while attempting to draw with a USB-connected tablet. By the time they plugged in, booted up, and opened the application, 10 minutes of our 45-minute class were gone. Often the technology consumed our attention, sidelining the artistic thought process.
 iPads to the rescue
Everything changed with the introduction of iPads. The touch screen eliminated the need for a time-sucking graphic tablet. Where the stylus or finger touches the surface is where the mark is made. What a game-changer! Simple yet powerful creation apps could then open up the curriculum to advanced concepts, such as working with layers, transparency, image manipulation, and animation. I realized my students needed access to iPads. So I wrote grants, entered contests, and rallied community fund-raising until I was able to purchase a class set. Here are three of my most successful iPad-centric projects, all using the Do Ink animation App, yet each one digitally extends learning in different ways.Understanding the vanishing point…with Godzilla!
If students create a one-point perspective city scene with converging lines to the vanishing point, then why not extend the lesson with a visit from Godzilla? Students can draw a simple flip-book–style animation of a Godzilla-esque creature that is made to travel over their art while changing in size from the foreground to the vanishing point. This would not only create a natural tie-in to their cityscape but give them an opportunity to use dynamic media to demonstrate how size changes as an object travels towards the background (extending the learning) while also exploring animation tools (expanding the curriculum). The Do Ink app has two modes, drawing and composition. The flip-book–style animation of Godzilla was drawn with only two frames in the drawing mode. I drew the initial image with black line, being careful to always create closed shapes. Then I filled those shapes with color, using the pour bucket, and I clicked + to add a new frame. The default setting in the app reveals an “onion skin” of the previous frame, so you can easily see how to make your next drawing similar yet slightly different to show movement. The play button gives you a quick preview of how the animation will move. The composition mode is where you organize your layers, set your timings, choose your animation path, and adjust for size difference from foreground to background. Once your students have demonstrated their understanding of how size changes in relation to depth on a picture plane, they may be ready to apply that knowledge to the world around them. Try challenging them to take a photo with the iPad that shows one-point perspective. Then ask them to animate their Godzilla through their image, to discover how size changes from near to far.
 Tackling transparency…with ghosts!
The Do Ink app allows any object that moves across the animation stage to have its transparency adjusted. I could make an object invisible then gradually become fully opaque, or I could set it to any percentage of transparency for its entire duration on screen. The implications of this were obvious for our second-grade spooky landscape project. I challenged my students to create a ghost in the foreground, a haunted house in the middle, and a night sky in the background. They were tasked with creating a sense of depth with overlapping and relative size. Students took a digital picture of their landscape for the bottom layer of the animation, drew a two-frame flip-book–styled ghost in the drawing mode, and moved it across the artwork with a semitransparent setting in the composition mode. My students saw their partially see-through ghost fly in the foreground over their paintings, which helped them to understand the concept of transparency in a memorable and exciting way. Their work was submitted digitally and compiled into a spooky class movie, set to music they composed using the NodeBeat app. The success of this lesson taught me that it is no longer too hard for even my youngest students to animate.
 Grasping animation…with aliens!
I chose to teach figure drawing to my third graders through animation. It allows for more than just implied movement in a static 2-D drawing but convincing motion through a series of drawings. Since I wanted the kids to be able to get creative, I suggested that the figures be aliens. That would let them use imaginary proportions, colors, and features. The class drew their alien four times in the Do Ink app drawing mode to show the four stages of running from a handout I created. The onion skin feature helped them see the changes they were making from pose to pose. Once the series of alien drawings was complete, kids could preview the finished product to see if it looked the way they wanted. If not, they could easily go back into any frame to edit their work. Students then opened a new composition in the same app and imported their alien animation. They moved it from off screen on the left to off screen on the right for a two–three seconds running animation. To extend this lesson, in similar fashion to the ghost exercise, students took a photo of a space in the room and made their alien run across it. These little clips were exported to video, uploaded to Dropbox, then grouped together into a class movie, “Alien Invasion of the Art Room.” I am only in the beginning stages of using animation in my art room to extend learning digitally and to expand my curriculum. I have more ideas than time! Some of them will incorporate storytelling, literacy, optical illusions, metamorphosis, stop-motion animation, and rotoscoping. For even more inspiration, view more than 150 STEAM art lessons with links, tutorials, and examples.
Added To Cart
RELATED


RECOMMENDED
CAREERS
The job outlook in 2030: Librarians will be in demand
CAREERS
The job outlook in 2030: Librarians will be in demand
ALREADY A SUBSCRIBER? LOG IN
We are currently offering this content for free. Sign up now to activate your personal profile, where you can save articles for future viewing
ALREADY A SUBSCRIBER? LOG IN
Thank you for visiting.
We’ve noticed you are using a private browser. To continue, please log in or create an account.

Add Comment :-
Be the first reader to comment.
Comment Policy:
Comment should not be empty !!!